Lenovo Yoga - Charging Port Repair

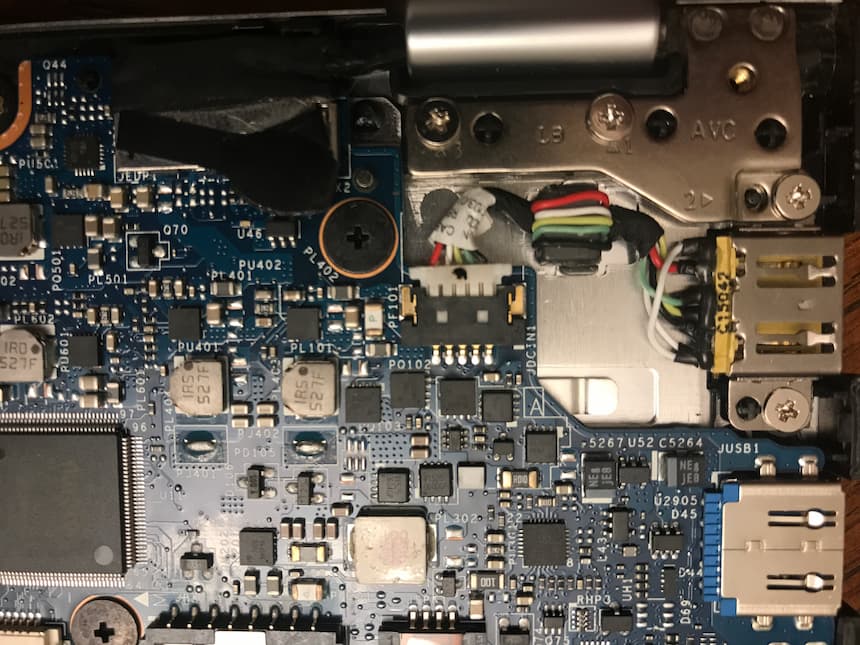
We bought a new Lenovo Yoga 700-11isk laptop a couple years ago and kept having problems with it charging. We went through 2 AC adapters, and even replaced the charging port. It suffers from a poor design that causes the charging port to become loose over time, and ultimately stop charging.
After the last round of AC brick and charging port replacements, it worked for a while (~6 months) and fell victim once more. I decided to cut apart the charger in hopes of hard-wiring it, but after tearing apart the plug I didn’t find 2 wires like I expected. Instead, I found 3 wires plus a circuit board which totally threw me for a loop. I panicked, put it all back together, and just added a small piece of clear self-adhesive stick-on plastic to the bottom of the plug. This made the plug very snug when it fit into the charging port.


That worked for another 8 months, which brings us to today, February 28th.
It stopped working again and I was determined to A) Make it work, B) Break it past the point of no return, or C) [accidentally] light it on fire.
Trying to figure out the 3-wire shenanigans, I checked the voltage & found that both positive wires put out right around 5 volts, even though it’s a 20-volt adapter. Weird, right? Someone recently posted an incredibly helpful technical note on the Lenovo Forums which pointed me in the right direction. Apparently Lenovo does some trickery where it’ll only bump up to 20-volts after the adapter is plugged into the laptop. That means I’d have to keep the wiring intact and just replace the plug.
Looking at the top of the AC adapter’s circuit board, we can see that the red (V+) and black (V-) wires are connected (via light-green circuit path) to the pins immediately above the solder joint.
The two inner pins on the circuit (normally used for data on a USB plug) are not connected at all. After all, it is just an AC adapter.

Flipping the circuit over, you can see that the White wire is connected to the two outer pins. These pins are not present on a normal USB connection - this is Lenovo’s way of getting extra current to the laptop.
Now that we have that part figured out, take a look at the charging port.

Green/Yellow on the inside pins are for data (only used when a regular USB device is plugged in). Red/Black are the normal power pins, and the white wires on the outside pins are Lenovo’s *extra* current pins. Why they went with 6 pins, instead of 5, I’m not sure.

The wires were so thin (and short), I opted to try and keep the pins intact. I folded them in half, soldered them to a connector, and slathered them in hot glue. (The green/yellow wires just got cut since I’ll never use this port for a USB connection anymore, and the extra white “jumper” wire shown in the picture is just laying in the glue; it’s not connected to anything despite what it looks like).
I soldered the AC adapter wires to the other half of the connector and slathered those in hot glue as well.

I plugged it in, and it works!
It’s not pretty, but it’s functional. At this point, I’ll take what I can get with Frankenplug 2.0.
**Update** 7/16/2020
It’s been over 2 years since this hack job, and it’s still performing flawlessly!
**Update** 10/16/2021
The plastic sheath on the red wire became brittle/cracked and eventually came loose. I should’ve heat-shrinked them. My 3rd and final attempt at rewiring Frankenplug proved to be it’s last. It stopped working & had to trash it :(
It had a good run.